People I Know
- Ghim Moh Gang
- Boilermakers
- Roomate
- Girls addicted to almost anything
- Apparantly my lookalike
- Cathetar boy
- Blow fish
- Mad Hatter
Previous Posts
- first thing that had to go were these butt as ugly...
- This is Mya! she's my first car and although very ...
- This is my girl....her name is Karen and she's won...
- About Myself
- Up and Running....i hope
Archives
- March 2005
- April 2005
- June 2005
- July 2005
- August 2005
- October 2005
- December 2005
- February 2006
- March 2006
| Powered by TagBoard Message Board |

Car & Driver
Monday, March 28, 2005
Interior Pics!

Here are pics i took today when it was finally sunny and decently warm. this is her bad side...you cant see it but some arse put two big ol dents on the front fender...need to get them pulled out. Found a paintless dent remover person here in town who apparantly does good work so i will try him out when i can afford not to have a car. Forgot to mention last time about the brake upgrade with zimmerman cross drilled brakes with mintex red box pads... shouldve gotten stainless steel brake lines and dot 4 brake fluid but the brakes were already a big hole in my pocket

Here's my new headunit after the fire. Panasonic CQ-C9700U....70Wx4 with pre amp outputs, auxiliary and sub outputs too...good stuff...even managed to put some porn on there to personalize the car :) Those are the stock knobs i replaced the ugly silver ones with. Up above is the Escort 8500 radar detector...cant say its saved me from anything yet but it sure has been useful

Ugly ass 'party' seats as vw affectionately calls them...swapped out the flat black door pulls for the mk3.5 cabrolet polished metal ones that really add a classy touch to the interior.

Aftermarket R line shift knob with custom center console. Had to trim the center console to fit the silver bezel holding the boot in place. took a while and got myself really dirty but i think it was well worth it. A dieselgeek short shift kit adds to the joys of shifting. top left corner you see my shoe resting on audi TT pedals that look real nice.

Besides installation of the headunit and fitment of the rear speakers, all the audio stuff was done by yours truly with the help of master solder and new found audiophile lionel. These are the front speakers...they are MB Quart 6.5" PCE 216s.. had to cut a hole in the door to fit the tweeter where it currently is and used some hot glue to hold it down...imaging is a bit of a problem but it certainly looks good there... the tweeters are a little bright, as MB Quart tweeters are known to be so i had to fade the sound to the back a little so the highs and mids weren't so piercing. The woofers fit right into the stock position. now i just have to find stock grilles from somewhere and slap em on. Wiring from the doors through the door grommet was a real pain in the neck with me having to contort myself into weird positions to get to places and having to drill holes in sockets to get the 16 gage speaker wire to fit not the most fun in the world but do it once and do it good

These are my rear speakers... they are Polk/MOMO MM6 6.75" components. Definitely not MB Quart standard but good enough for being a good filler. Front speakers are always more important than rears unless youre trying for a surround sound effect which takes alot of calculation , time and imaging. Plus these speakers look really good in my opinion. Crossovers for both front and rear speakers are placed under the rear foldable seat cushions and all wiring is also hidden there. Definitely needs some tidying up but it really isnt a priority right now.
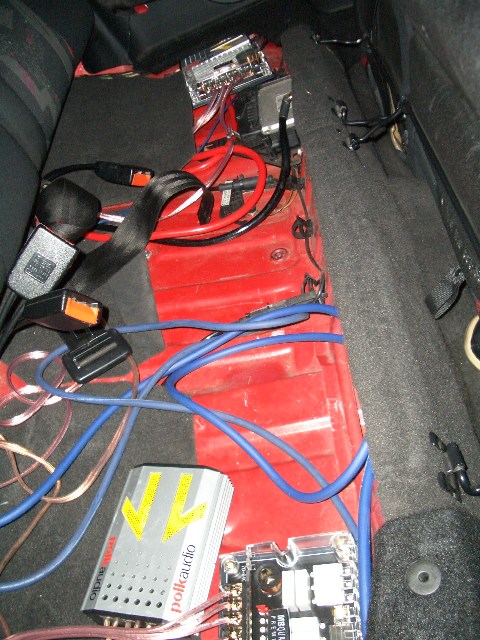
see what i mean by messy? im having a whine with increasing rpm in my left speaker right now...classic case of bad grounding either by the headunit or the amp...its most likely my amp grounding so i will have to fix that as soon as i can. which might only be in the summer. All power cables were run along the driver side and all rca cables were run along the passenger side...not sure if i shouldve taken more time and run the left speaker wires all the way over to the passenger side but i figured it was a little overkill...

here is my amp, mounted it in a very ghetto fashion but it would have to do. basically just tapped around for a solid point and drilled them on. This is a Soundstream Van Gogh VGA800.5 5 channel amp. Definitely makes the install a whole lot cleaner than a 4 ch bridged to a 2 ch. probably shouldve done a better job of hiding the wires by using a mdf board and mounting to that instead. Maybe overthe summer i could get someones help. 4 gage Monster cable powers the amp and monster cable 2ch and 4 channel RCA cables link up to the headunit speaker and subwoofer preouts. I know monster cable is probably waay too overpriced but i couldnt keep myself away from the "bling" brand of wires
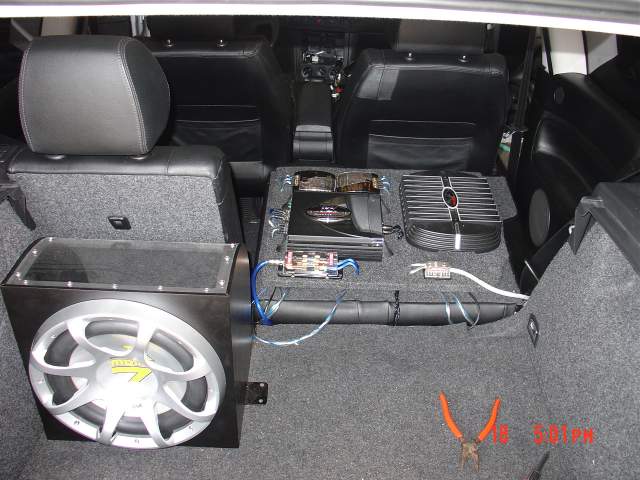
this is the subwoofer i am rocking...its Polk/MOMO MM12 subs which is factory enclosed. This is a pic of another install which i think looks much much cleaner than mine. need to find out how he carpeted the amp board and the sub board and how he attached them too. I figured for my sub board to just cut a piece of MDF board to the size of my trunk and just carpet it and slide it in...no need for screwing it down since its fitted and wont be shifting around a whole lot. then just screw the sub right onto it. Again, this probably would only be done over the summer when i have lots more time. Tomorrow, engine pics and a list of mods still to come!
7:09 PM
![]()